


Fungus gnats have to be one of the most annoying yet most common pests you can get when growing plants indoors. It’s almost a rite of passage for any indoor plant grower at this point to go to Google or YouTube and search “how to kill fungus gnats”.
One of the most popular and effective ways to get rid of fungus gnats is to give your plants a thorough watering with a 1:4 mixture of 3% hydrogen peroxide and water. Within about 1-2 weeks, the last remaining adult fungus gnats should die off with no remaining offspring to continue their lifecycle.
Here’s a great video by a youtuber named Dat Plant Dude that covers all the steps and shows the results:

If you want a written breakdown of how exactly this works, let me walk you through the process step by step.
Table of Contents
0. Confirm that you have fungus gnats and not fruit flies


Before we even begin talking about how to treat your fungus gnat problem, we should first confirm that you do indeed have a fungus gnat problem.
It’s pretty common to make the mistake of assuming you have fungus gnats when you actually have fruit flies or vice versa.
The problem with having fruit flies instead of fungus gnats is that fruit flies don’t typically grow and lay their eggs in plant soil. Instead, They’re more attracted to decaying organic matter commonly found in compost bins on kitchen drains.
Although you could find the fruit fly source and apply a hydrogen peroxide solution, it might not be the easiest or most effective method you could be using to get rid of them. Plus, it could be harder to track down all of the sources if it’s not limited to just the plant soil.
For fruit flies, you might be able to get rid of them by cleaning your sink or compost bin and setting up an apple cider vinegar trap. I won’t get into too much detail on how to do that here, but there are plenty of how-to articles and videos you can find with a quick search.
To tell the difference between the two, here are a few key differences that you should look for.
| Fungus Gnat | Fruit Fly | |
|---|---|---|
| Body type | Thin and skinny body with long legs | Rounder and more “compact” shape |
| Color | Darker, black color | Lighter, brown color |
| Location | Moist plant soils | Kitchen drains, compost bins, and ripe fruit |
If you’ve concluded that you do have fungus gnats, you can continue with the steps below to get rid of them.
1. Quarantine the infested plants

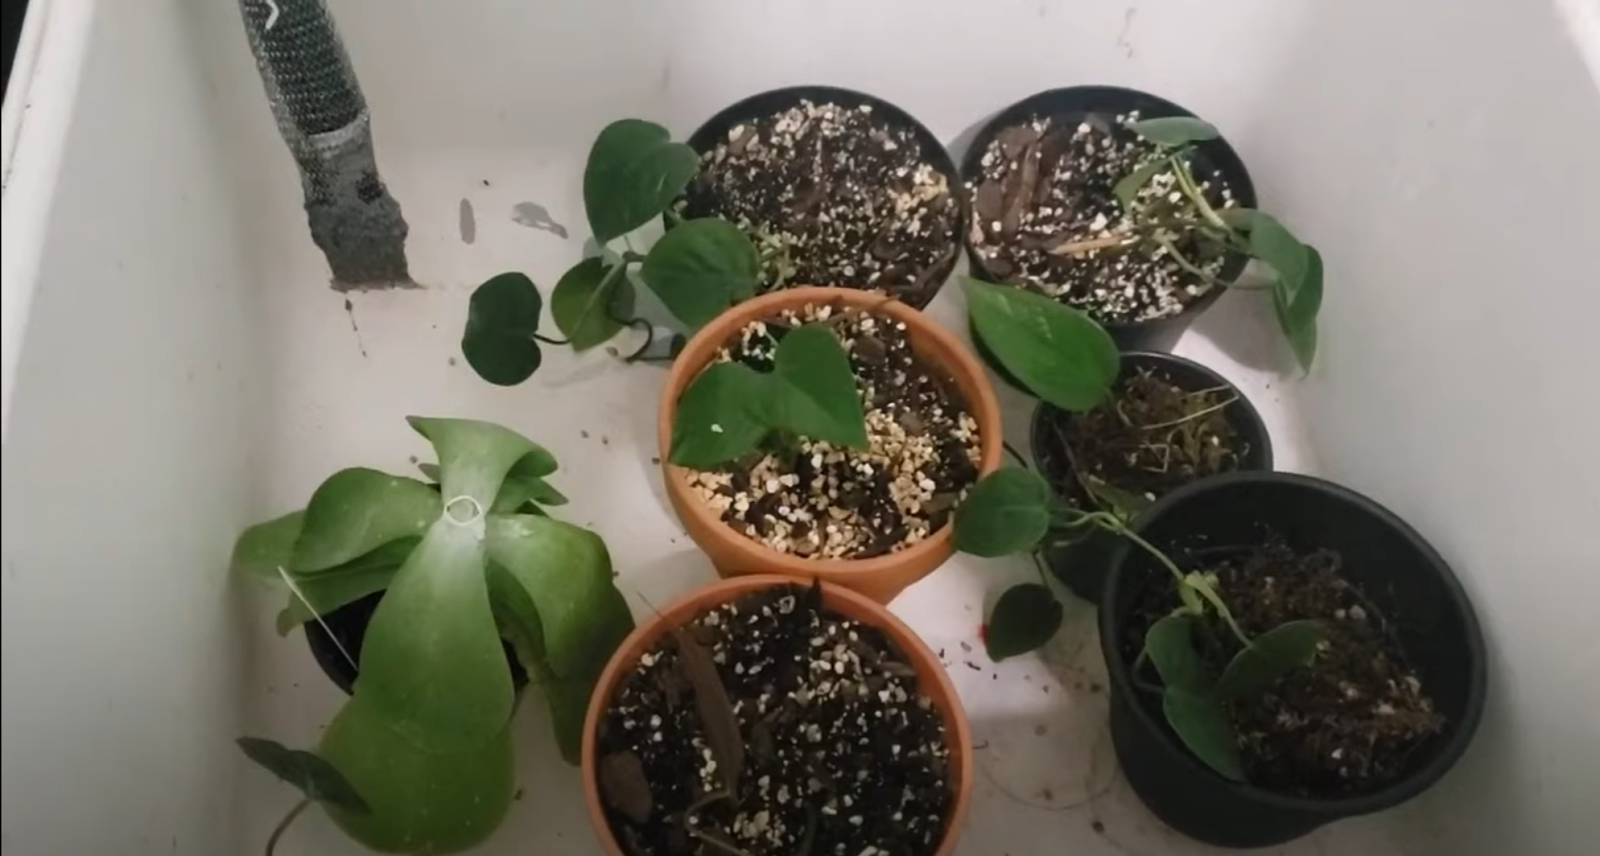
The first step you’ll want to do is quarantine your plants to do some damage control by preventing the spread of fungus gnats to your other plants.
It’s probably a good idea to be conservative and quarantine any plants that you have even the slightest suspicion of harboring fungus gnats.
Even if you don’t necessarily see swarms of fungus gnats in the soil, it’s possible there could be some newly laid eggs in the soil that aren’t visible. In fact, female fungus gnats only live for about a week but can lay anywhere between 100-150 eggs during their short adulthood.
That’s almost one egg every 1-2 hours.
So if you see fungus gnats buzzing around in the general vicinity of where you keep your plants, it’s safe to assume that those plants are at risk of fungus gnat infestation.
As for where to quarantine your plants, you can keep them wherever is most convenient for you to lock them away without taking up too much frequently accessed space in your home.
But if you want my recommendation, I would recommend keeping them in your bathroom if you can. There are a few good reasons for that:
- It’s convenient to water them since it’s right next to a water source with drainage in the sink or in the bathtub/shower
- It’s not too much of a highly trafficked area in your home, so you can keep the door closed most of the day and get away from the fungus gnats. Extra bonus points if you have a separate bathroom that isn’t used too often
- If you can fit all your plants in the shower, you can close the curtain and keep the fungus gnats mostly contained in one area of the bathroom
- Most bathrooms have porcelain flooring or a porcelain bathtub, which makes it easier to see the fungus gnats and kill them by hand if necessary.
- Generally, it’s easier to clean up any spilled soil, fallen leaves, or dead fungus gnats in the bathroom with a quick sweep or vacuum
Once you’ve quarantined your plant, now you can get started on making the hydrogen peroxide solution.
2. Get 3% Hydrogen Peroxide, a measuring cup, and a watering can

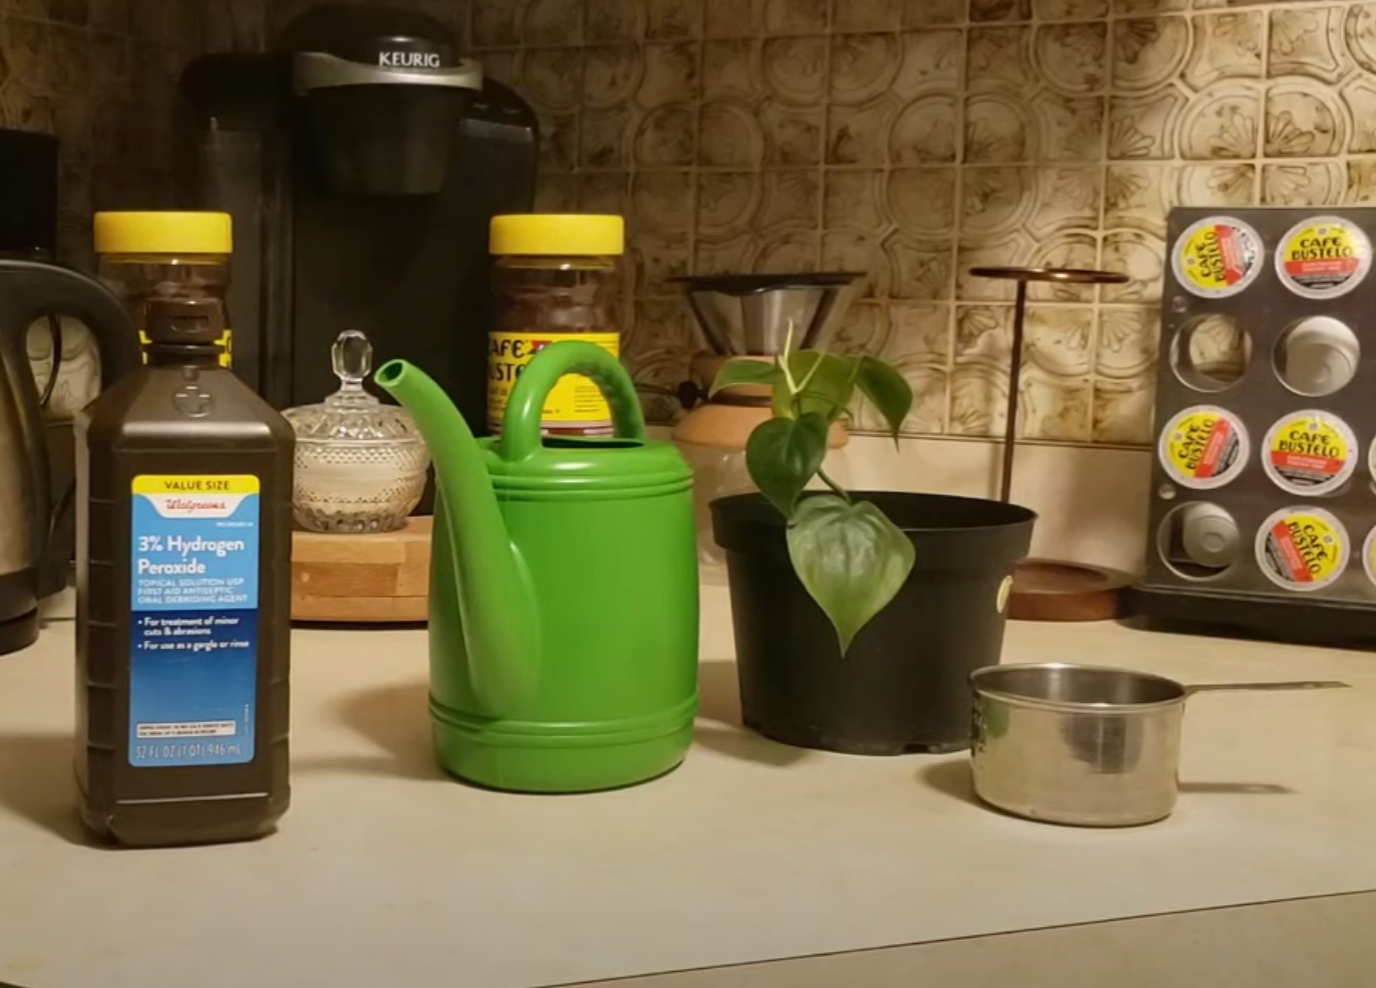
Let’s start with the key ingredient: hydrogen peroxide.
Hydrogen peroxide is a commonly used disinfectant that you can find in most drug stores, the pharmacy section of most grocery stores, and on Amazon. Most people use it to treat small cuts or for cleaning.
3% is the most common concentration that you’ll find in hydrogen peroxide bottles. If you’re in the store and you see a brown rectangular bottle about the size of a bottle of soda, it’s probably 3%, but you can always double-check the label to confirm.
A 16 fl oz bottle should be enough to make half a gallon of solution after mixing it with water. I think that should be enough for most people with a handful of indoor plants that need treatment, but if you have a lot of plants to water (especially a lot of big plants), you could consider getting a 32 fl oz bottle.
In case you happen to have a higher concentration of hydrogen peroxide, it can still be used. You will just need to increase the ratio of water you’re going to be using in the solution. I’ll talk more about that in the next step.
The other two materials that you’ll need are a measuring cup and a watering can. The measuring cup will be used to get the right ratio of hydrogen peroxide to water and the watering can will be used to store and distribute the solution to your plants.
In case you don’t have either of those, any cup or container capable of holding some liquid will work. Even a plastic water bottle or an empty can of soda will be fine.
Since it’s a pretty simple mixture ratio, you don’t need to measure exact amounts. So instead of 500 ml of hydrogen peroxide to 2000 ml of water, you would be mixing 1 full soda can to 4 full soda cans of water.
In place of the watering can, you should look for something big enough to hold a decent amount of your solution.
Since you’re going to be watering your plants over the course of one or two weeks, a bigger container would be better. That way, you don’t have to keep on making a new batch of hydrogen peroxide solution every time you need to water your plants.
If you have one available, a spray bottle would also work nicely to evenly distribute the hydrogen peroxide mixture on your plant soil.
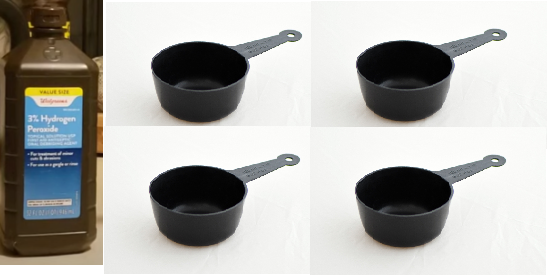
3. Mix a one-to-four ratio of 3% hydrogen peroxide to water

It’s time to put your mad scientist hat on because this is where the mixing and measuring happens.
What you’re going to make is a 1 to 4 ratio of hydrogen peroxide and water. What I mean by a 1 to 4 ratio is you will create a mixture that has one part hydrogen peroxide for every four parts of water by volume.
In case that’s a completely foreign concept to you, here’s an extremely detailed step-by-step breakdown of what you need to do:
- Open your hydrogen peroxide bottle
- Pour the hydrogen peroxide into your measuring cup until it’s mostly full
- Put the cap back onto your hydrogen peroxide bottle so you don’t accidentally spill it
- Pour the hydrogen peroxide that’s in your measuring cup into the watering can
- Fill your measuring cup with water until it’s mostly full
- Pour the water in your measuring cup into the watering can
- Repeat steps 5 and 6 three more times
- Swirl the watering can a little bit to ensure the hydrogen peroxide and water are mixed
- Feel a sense of accomplishment for finishing a batch of hydrogen peroxide solution
Overall, it’s pretty simple. One cup of hydrogen peroxide and four cups of water and you’re done.


In case you happen to have a higher concentration of hydrogen peroxide, the ratio is going to be a little different. Here’s a table of what ratios you should be using for the most common hydrogen peroxide concentrations:
| Hydrogen Peroxide Concentration | Target Hydrogen Peroxide to Water Ratio |
|---|---|
| 3% | 1:4 |
| 6% | 1:8 |
| 12% | 1:16 |
If you haven’t noticed already, the math is pretty straightforward. If you have twice the concentration of 3% hydrogen peroxide, you should mix it with twice the amount of water, quadruple water for quadruple concentration, and so on.
Now, on to how to use the solution.
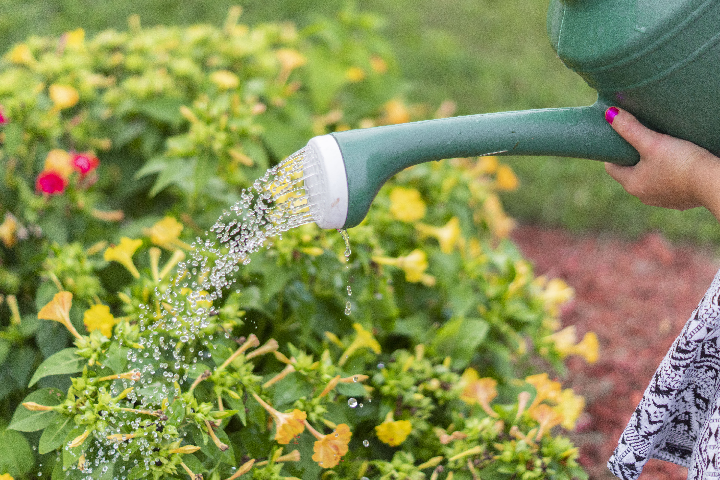
4. Water Your Plants with the Mixture Thoroughly Every 2-3 Days

Here’s where the magic happens.
You’re going to take your solution of hydrogen peroxide you just made and you’re going to water your plants with it. Just like you would water them normally.
Make sure to thoroughly cover the surface of your plant soil. Fungus gnat eggs are deposited in the top 2-3 inches of soil, so it’s important to ensure that your solution soaks through at least a few inches into the soil.
Since it takes between 4-6 days for fungus gnat eggs to hatch, you should be watering your plants with the hydrogen peroxide solution at least once every 2-3 days. This will instantly kill off any fungus gnat eggs and larvae on contact before they have a chance to become egg-laying adults.
Adults only live for about 8 days. So after about 1-2 weeks, you shouldn’t see any more living fungus gnats flying around your plants.
The scientific reason why hydrogen peroxide works so well at killing fungus gnats is because the oxygen atoms in hydrogen peroxide (H2O2) are highly reactive.
It’s really good at “stealing” electrons from living cells, causing them to break apart. It can actually do the same to human cells as well, which is why using it on wounds stings a bit.
And don’t worry, hydrogen peroxide at this concentration is completely harmless to plants. You might see some bubbles forming, but that’s just the hydrogen peroxide breaking down to oxygen and water.
Plant cells have an enzyme called catalase to break down small amounts of hydrogen peroxide before it can do any damage. In fact, the hydrogen peroxide is doing your plant a favor by aerating the soil with bubbles of oxygen.
5. Allow the Soil to Dry Out Between Waterings Going Forward


Now that you’re done treating your plants, there are a few steps you can take to prevent fungus gnats from infesting your plants again in the future.
The main preventative measure you want to take is to allow your soil to dry out between waterings. Don’t worry, your plants can handle being a little thirsty for a bit.
Fungus gnats are attracted to moisture. If you are watering your plants too frequently and leaving the soil constantly moist, that’s going to be a magnet for fungus gnats.
For indoor house plants, the surface of the soil should dry out in about 1-3 days depending on sunlight, temperature, and humidity where your plant is.
Since it takes 4-6 days for fungus gnat eggs to hatch, you probably would want to only water your plants at most once every other day to ensure there’s a short dry spell to kill off any newly laid fungus gnat eggs before they have a chance to hatch.
Having dry soil will also minimize the amount of fungi growing in the soil, which is a food source for fungus gnat larvae.
If you want to be extra safe, you can also set up yellow sticky paper near your plants to hopefully trap any fungus gnats that inadvertently make their way into your home.
If you like, you can even continue to water your plants with a little bit of hydrogen peroxide to ensure any hiding fungus gnat larvae and eggs are killed off early before they become a big problem.
Hydrogen peroxide is not just used to get rid of fungus gnats, but it’s also used to encourage healthy root growth by aerating the soil with oxygen and helping the roots absorb more nutrients from the soil.
By following these steps, you should have a completely fungus gnat free home from now on. Hope that helps!